Quick Start
Get from raw screenshots to export-ready App Store images in five quick steps.
Create a project
Open ButterKit and click Create New Project.
Bring in your screenshots
You have a few options:
- Xcode Simulator: ButterKit’s capture widget appears automatically when a Simulator is running.
- Drag and drop: Drop any PNG or JPG directly onto the canvas.
- Fastlane: Automate captures with Fastlane and link the output folder to ButterKit.
Tip: No screenshots handy? Take a quick Simulator screenshot (⌘S) or use any sample PNG.
Frame it in 3D
- Create an artboard and select the right size preset (e.g. iPhone for the App Store).
- Drag a screenshot onto the artboard to automatically frame it in a 3D device.
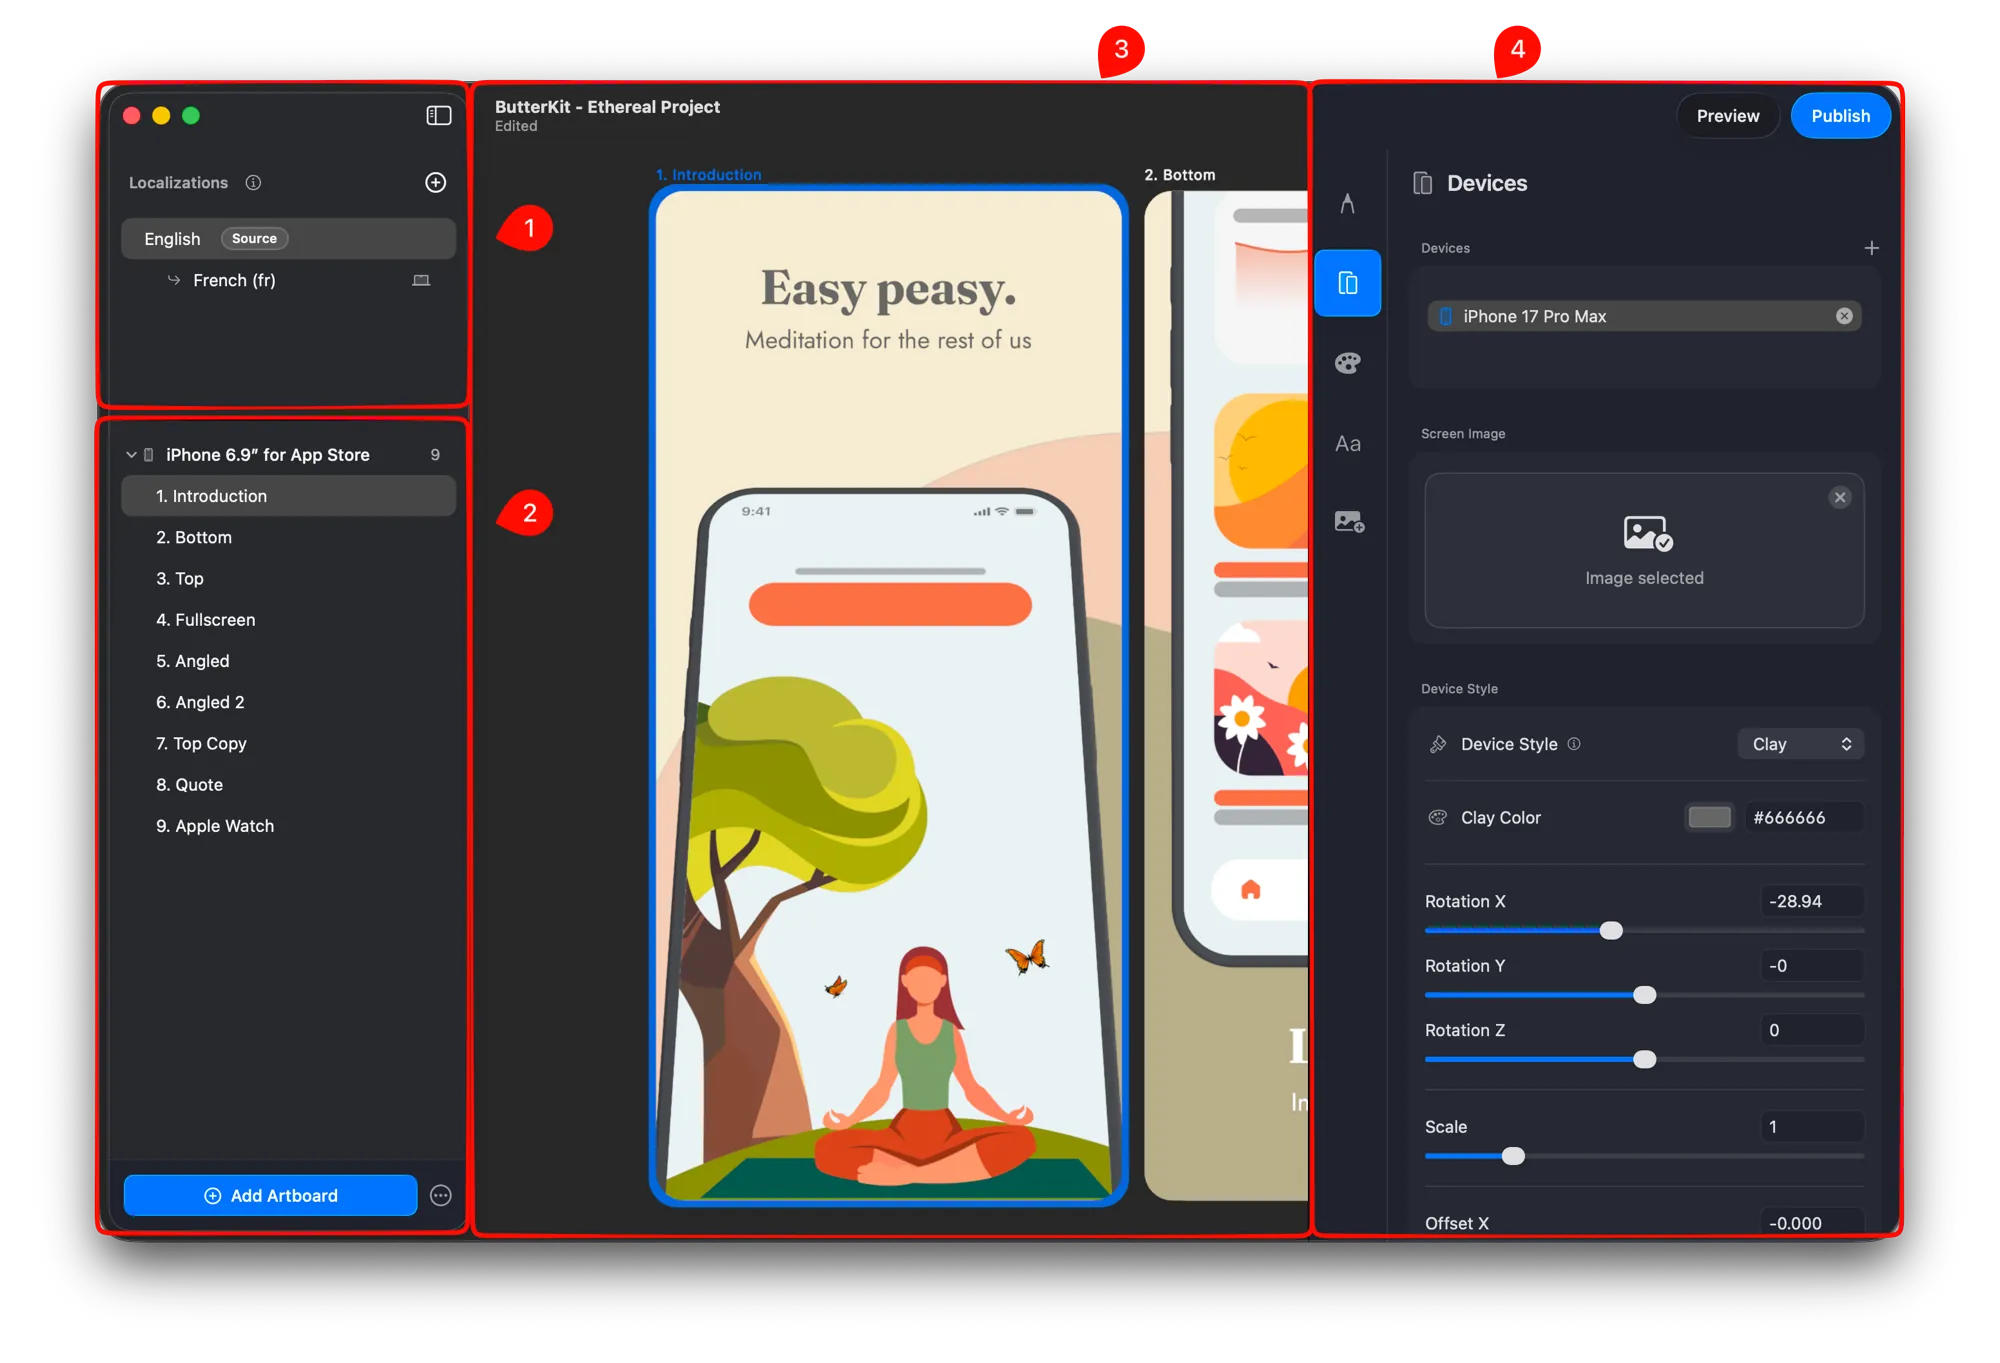
Select an artboard in the main canvas (3) and edit in the Inspector (4)
Add localizations
- Select an artboard and open the Text section in the Inspector.
- Write a headline that highlights a key feature.
- In the Localizations panel (section 1 above), click + to add languages. Translate automatically on-device or with providers like OpenAI.
Tip: If you would rather translate manually, just select “Manual” in the “Translate with” dropdown when adding a localization.
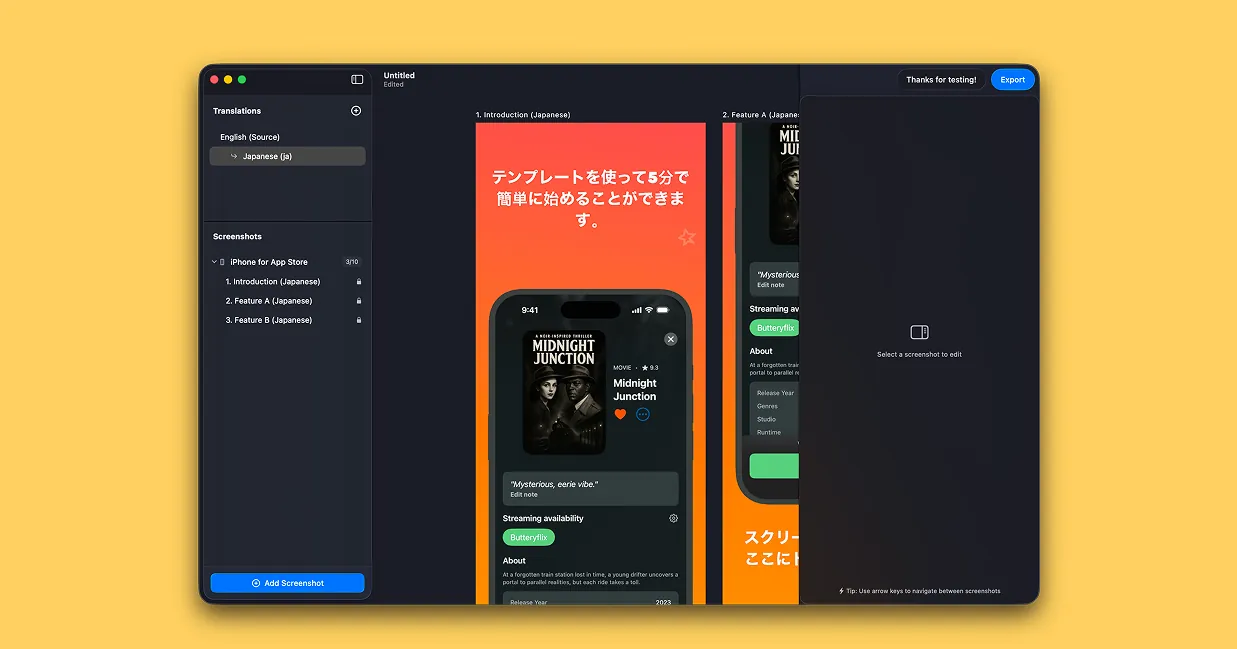
Export
- Press Export in the top right.
- Pick which artboards to include, choose an output folder, and hit Export.
- Bulk export your PNGs or upload straight to App Store Connect. Voila!
Quickly translate your screenshots into all App Store Connect languages
That’s it! You now have professionally-designed, translated screenshots ready for App Store Connect.
Quick Help
- Need more help? Browse the Documentation
- Check out our Templates & Add-ons
- Join us on Discord for quick help
- Any other questions? Get in touch