How to render screenshots onto 3D devices
Most screenshot tools rely on flat 2D device frames overlaid on your images. ButterKit is different – it uses a real-time 3D rendering engine powered by Metal, so the devices you see are actual 3D models you can rotate, angle, and customize freely. This gives you full creative control over perspective, lighting, and composition without waiting for renders or juggling external mockup tools.
Editing and rotating a 3D Apple Watch model in ButterKit's real-time Metal renderer
Quick Start
Select an artboard
Open your project and select the artboard where you want to add a device. If you’re starting fresh, pick a template to get going quickly – you can always customize from there.
Tip
Get started quickly with templates, then adjust from there. Download free templates
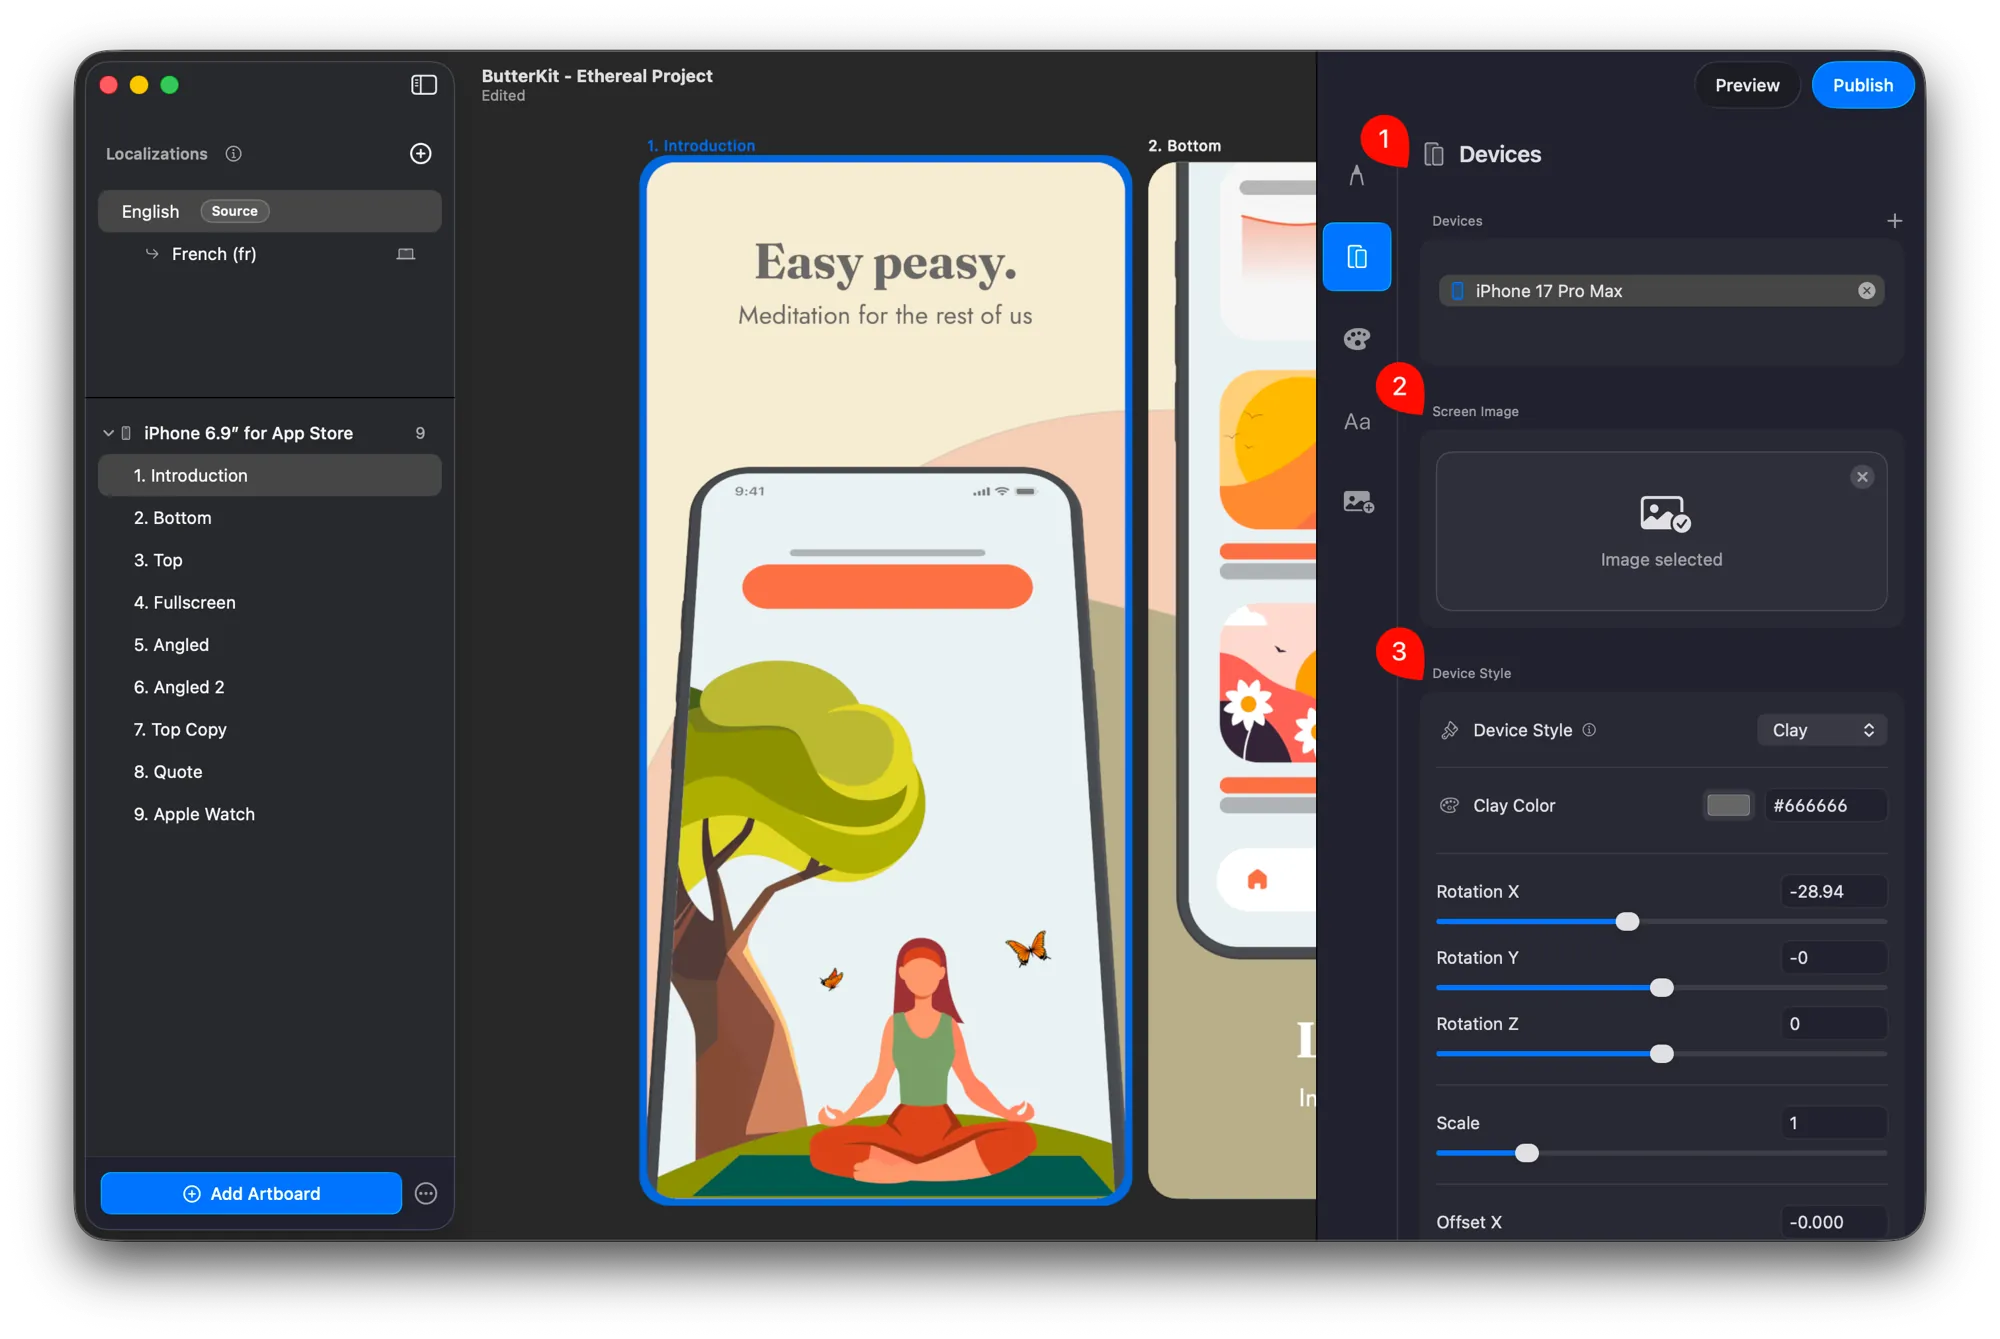
Open the Devices Inspector
With the artboard selected, open the Devices Inspector in the right sidebar. This is where you manage all 3D devices on the current artboard.
Add a device
Click the + button in the Devices Inspector to add a new device. Choose from the available models – for example, iPhone 17 Pro Max, iPad Pro, Apple Watch, Mac, or Vision Pro.
Place your screenshot on the device
Simply drag an existing screenshot image from Finder onto the device and it will be placed automatically. You can also press the Select Image button in the inspector to choose an image via the file picker.
Once placed, you have full 3D control – rotate, scale, and reposition the device to get exactly the composition you want. Changes render instantly with no export step required.
ButterKit renders your screenshots onto photorealistic 3D device models in real-time
Pro tip: link an entire folder
If you have a batch of screenshots ready (e.g. from Fastlane or Xcode Simulator), you don’t need to drag images one by one. You can link an entire folder and ButterKit will automatically import and organize your screenshots – and keep them updated as the images change.
This is especially powerful when combined with CI/CD automation or multi-language screenshot capture.
Learn how to link an image folder →
Quick Help
- Need more help? Browse the Documentation
- Check out our Templates & Add-ons
- Join us on Discord for quick help
- Any other questions? Get in touch